
Shining a spotlight on one of the most captivating aspects of VFX creation: Characters and Creatures. From fantastical beasts to lifelike characters, animated assets can be one of the more daunting areas to embrace.
Today, we’re shining a spotlight on one of the most captivating aspects of VFX creation: Characters and Creatures. From fantastical beasts to lifelike characters, animated assets can be one of the more daunting areas to embrace.
In this post, I want to break down the key steps involved in character creation, and shortcuts that you might consider to speed up each one.
1. Concept
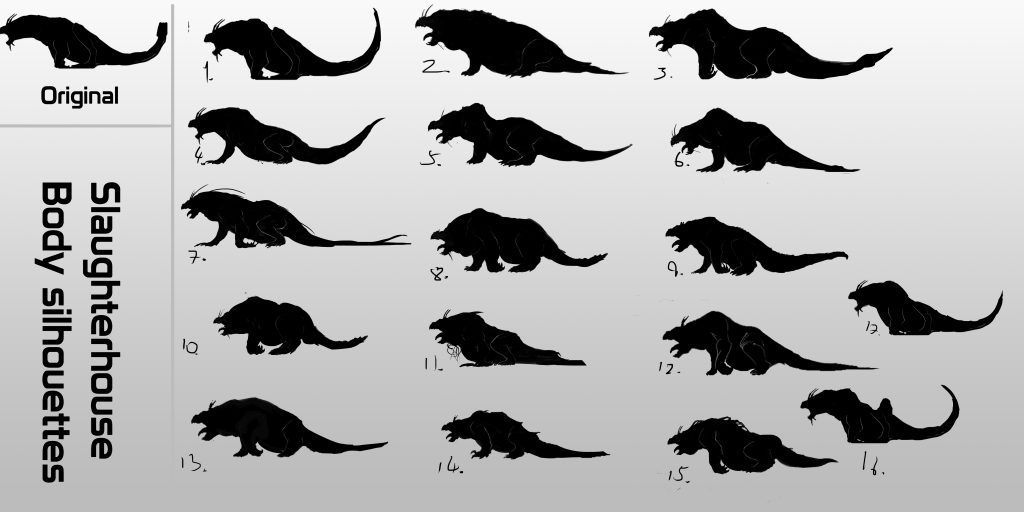
If you’ve never designed anything in your life, don’t worry. Instead of thinking about it like a designer, think about it like an actor preparing for a role. What does your character/creature do, where does it live, what does it eat? When you know those things, you’ll understand your creation much better. It doesn’t need to look good, it needs to be authentic.
I generally jump from very quick sketches/silhouettes to 3D. Quick sketches allow you to work out key beats even if you’re not comfortable drawing, and they’re much faster than 3D. But the end result will be 3D, so you should jump there as fast as possible
Shortcuts:
Buy it! - If you find something that you like on somewhere like turbosquid.com or cgtrader.com, you can just buy it and skip out a bunch of steps, often including rigging, and even sometimes animation too.
Kitbashing (using libraries of pre-made parts, such as those at kitbash3d.com)
Photo bashing You can get a lot of interesting data very quickly by just sticking together different photos. The downside with this is that you might create really interesting concepts that you don’t have the experience to make in 3d
AI image generation, like Midjourney. I’m not personally against this - I use it as idea generation rather than concept generation, same as googling real-world reference and photo bashing
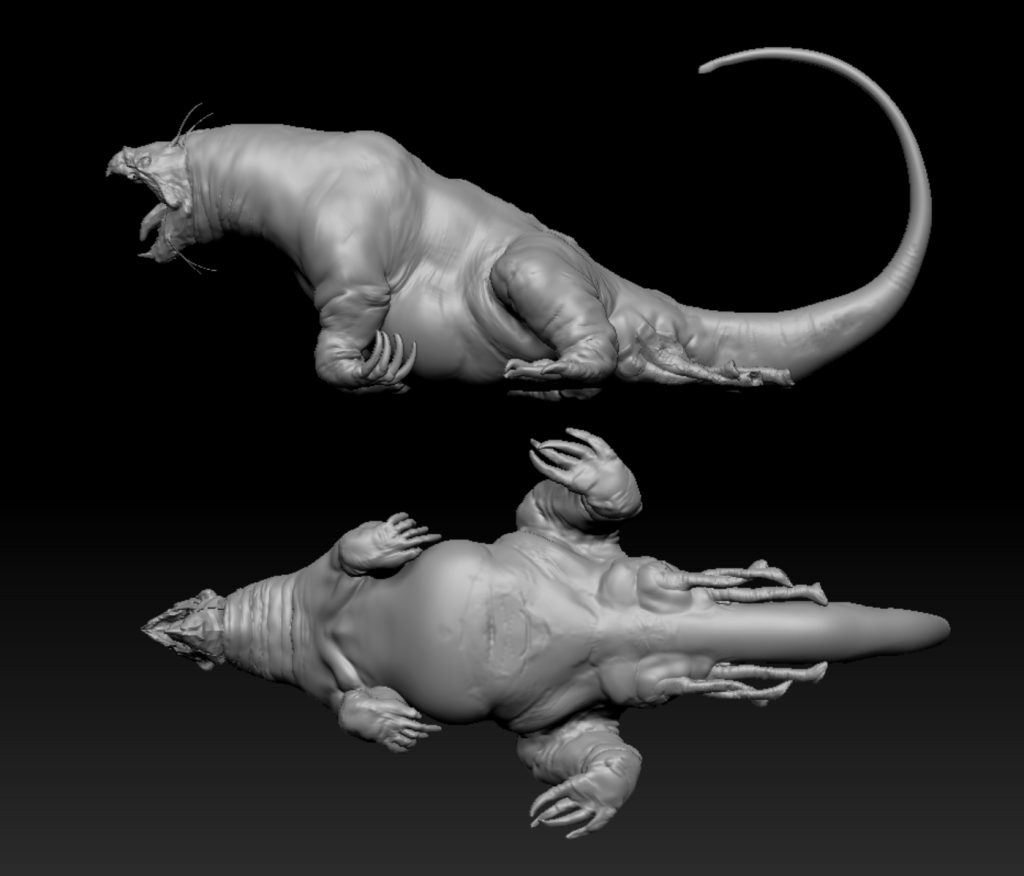
2. Modeling
Actually making the thing! For creatures, there is an extra consideration of topology, which is the flow of the polygons over the surface. That matters a lot at a very high level, but for anything less than a Hollywood level creature, I’ll use auto-retopology tools, of which there are many! Sculpting skills obviously help a tonne, but I’ll often use scans (such as those at 3dscanstore.com) as a base), and adapt them, just like a makeup artist sculpting on a cast of an actor.
Shortcuts:
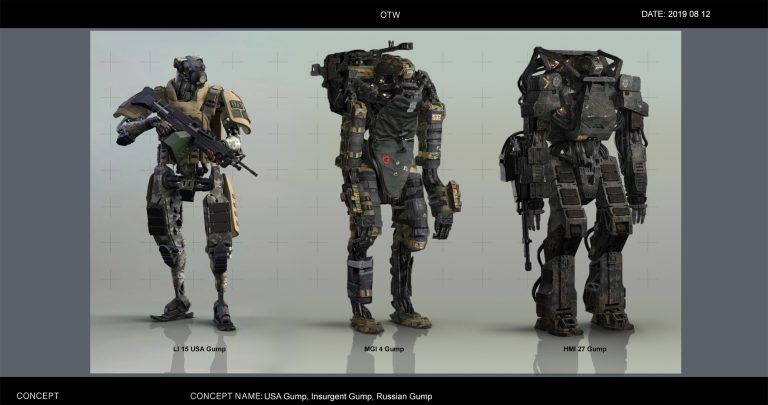
Kitbashing - See above! For things like robots, kitbashing is essential. At least 60-70% of the robots that we made for Netflix’ Outside the Wire are kitbashed.
Scanning - Some things are much easier to create or find in real life than they are digitally. Just make it, and use photogrammetry to scan it
3. Texturing and Shading
Texturing adds surface detail and color to the 3D model, while shading determines how light interacts with its surfaces. In professional VFX they’re done as 2 different stages often by 2 different teams. That’s madness to me!
Before texturing can begin, the model needs UVs, which is the process of “unfolding/unwrapping” the model to 2D dimensions. (Literally the opposite of wrapping a present in real life!) This can be a lot of work, but most 3D software has auto-unwrap solutions to lessen the pain
Shortcuts:
Procedural texturing, such as Substance Painter - SP will allow you to create many different textures with a few button clicks, and you can get really good results really quickly. For anything less than hero assets, I’ll often instruct my artists to “kick it through Substance Painter”. Literally, bring in the model, assign materials, export textures.
Understanding how materials work in the real world - Renders are designed to emulate the real world. Shading isn’t that complicated if you know how materials work. Luckily that’s covered in depth in the Shoot First course!
4. Rigging
Rigging is the process of adding a digital skeleton (rig) to the character, allowing animators to pose and animate it realistically. It’s not that different to puppeteering in real life - your puppet needs structure (in VFX that’s by adding “bones” to your character), and you need to be able to control it, so that you’re not grabbing and moving each bone by hand (we create digital controllers for that!)
Shortcuts:
Auto rigging solutions - This won’t work if you have very bespoke needs, but for a lot of scenarios, the complex task of rigging can be broken down into a series of button clicks using auto-rigging software. 90% of my rigs start with auto-rigging solutions, although we often work into them later.
5. Animation
If rigging is the main technical hurdle in character work, animation is for sure the main creative one! Everything hinges on the quality of the animation, although if your character doesn’t need to display complex emotion, then “good enough” animation is often good enough.
Mocap is increasingly accessible for all creators, although it does require an extra step of “mapping” the animation from the simple rig used for motion capture through to your intended rig, and mocap always needs some tweaking and cleanup afterwards.
Shortcuts:
Rotomation - “Tracing” over filmed footage. This technique is almost as old as animation itself, and doing it in 3D isn’t really different to 2D, you’re just using a rig to move your character, rather than re-drawing it.
Mixamo - A library of mocap/animated footage. If you needs are functional (jump, run, roll, action type stuff), you may find what you need here.
Mocap Suit - The Rokoko suit has democratized motion capture. Other cheap options are available, but I’ve only tried Rokoko. We’ve used it on Netflix, Paramount, and Disney projects.
AI Mocap - AI mocap can run right off filmed footage, and is significantly cheaper than a mocap suit. Quality is significantly worse, but there is flexibility in that you can use it anywhere that you can film (I imagine it’d work great on underwater shots, for example)
6. Effects and Dynamics
Depending on the character or creature’s design, additional effects and dynamics may be added to enhance its realism. This could include simulations for hair, cloth, or muscles/fat.
Shortcuts:
Shot sculpting – Instead of creating complex systems to achieve things like muscle tension, you can just sculpt on top of the animation. I do this ALL THE TIME. It gives you a lot more control than simulation, is 100% art directable, and very fast.
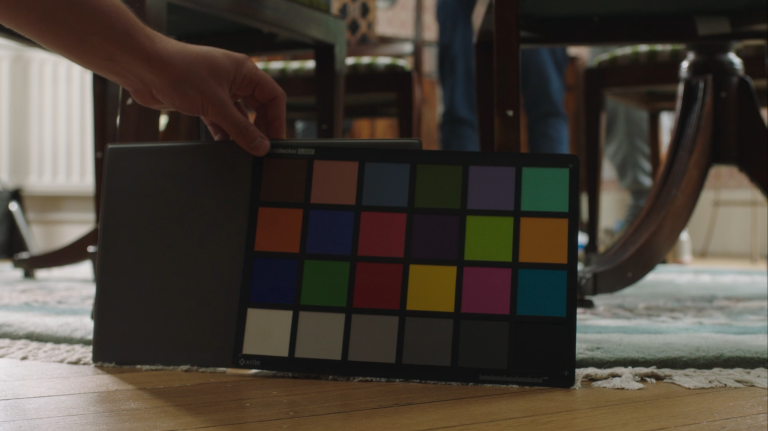
7. Lighting, Rendering and Compositing
Once all elements are in place, the final step is rendering the scene. This involves calculating how light interacts with the 3D models and textures to produce the images or sequences seen on screen. Compositing then integrates the rendered elements with live-action footage or background plates to seamlessly blend the VFX with the real world.
Shortcuts:
PLAN YOUR SHOTS! Limit interaction between CG characters and real world as much as possible. A character running across a rooftop and shooting is one thing. That same character wrestling with a live-action actor? Just…don’t!
Get great lighting reference from set, and spend time getting the 3D looking right. Most character shots we do are very fast comps, because we aim to get the 3D perfect, where all the lighting and materials can be calculated in a physically realistic way. You can only cheat that stuff so far in 2D.
Creatures and characters are a scary world to get into, and the learning curve is a little steep, but the payoff is huge! As always, if you’re experimenting with any of this, feel free to reach out for help or guidance